

It’s Raining Hearts!
Just a super casual way to show I love you!

Well, another Valentine’s has come and gone. This year felt extra special with the holiday landing on a Saturday a double the reason to celebrate!
Here’s what we did:
I started officially planning over holiday break. First, I wrote down every idea and task. Then I reorganized everything in the order it needed to happen (for example: ordering ice is day of, while ordering balloons can be done a month in advance). The biggest undertaking? Decorations. So I began there.
I always look back on the year before and ask myself where can I make things easier? What can I afford to do?
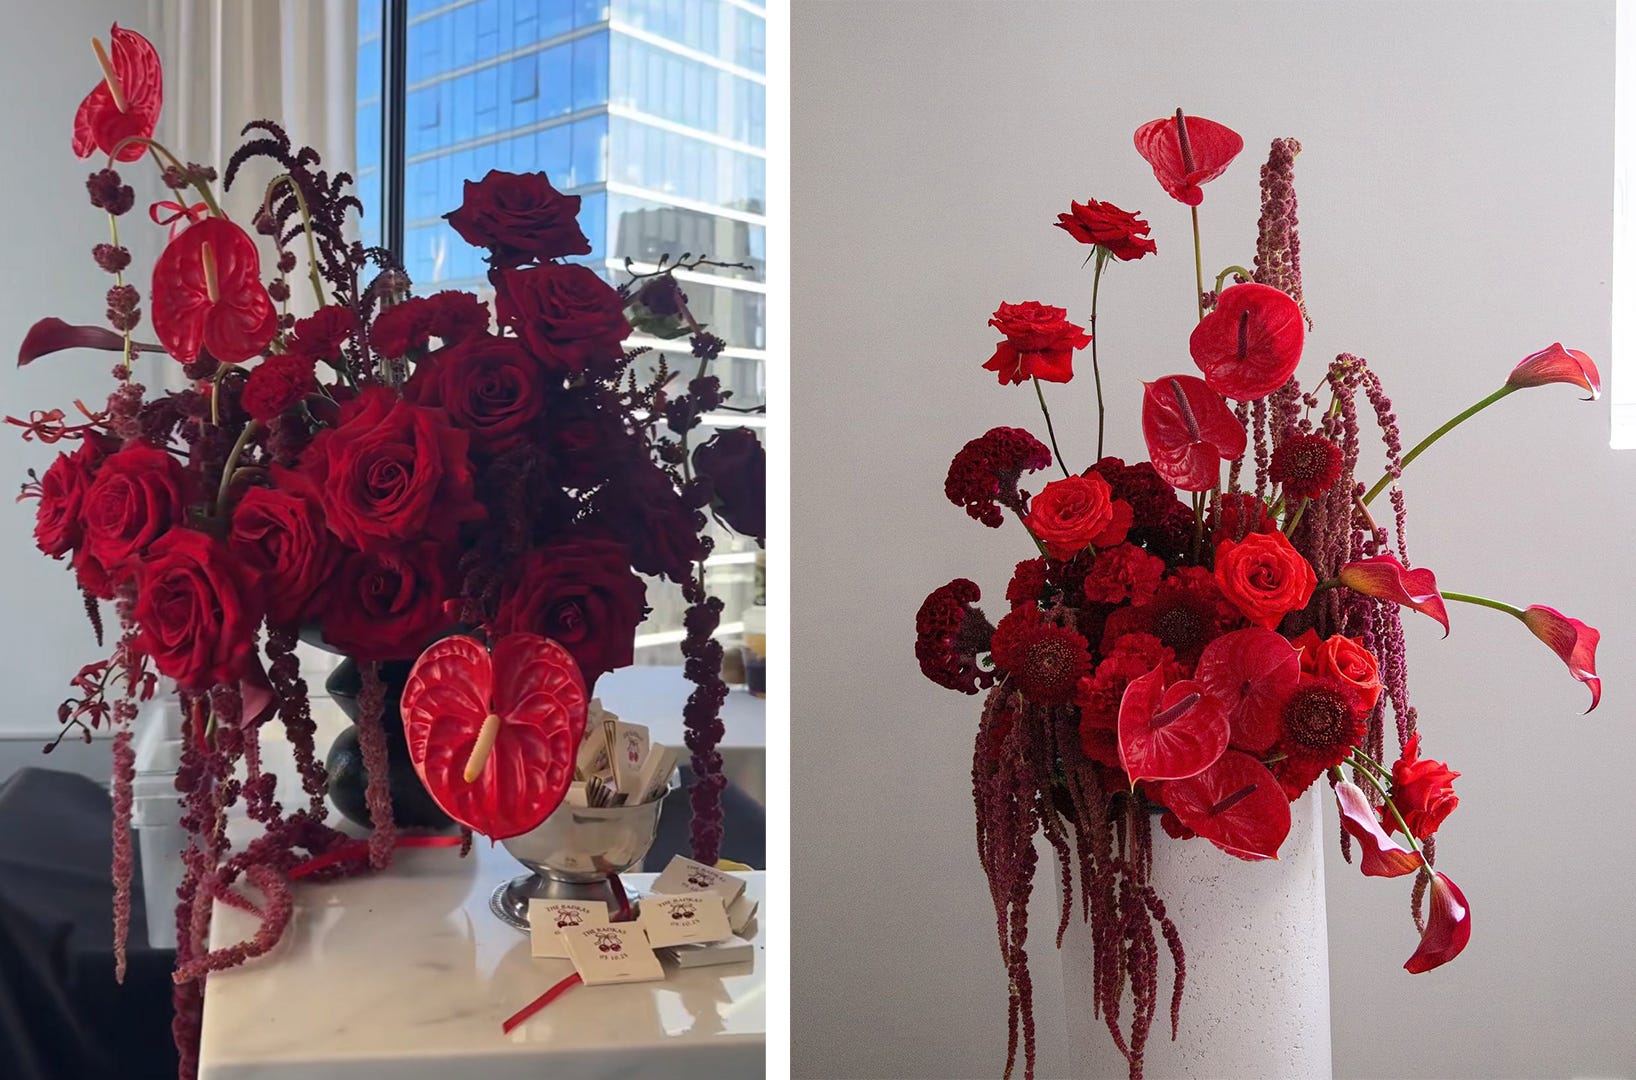
The past few years, I’ve handled the flowers myself–something I genuinely love. But waking up at 5A the week of the party to run to the market and assemble everything the day-of or before? The stress and mess start to compete with the fun.
This year, I decided to hand it off.
I reached out to Maka Flora in early January to secure the date before the Valentine’s rush. I sent over inspiration and outlined exactly what I wanted: two sculptural arrangements using only red flowers–one for the kitchen and one for the living room.
Booked. Confirmed. Check. Moving on!
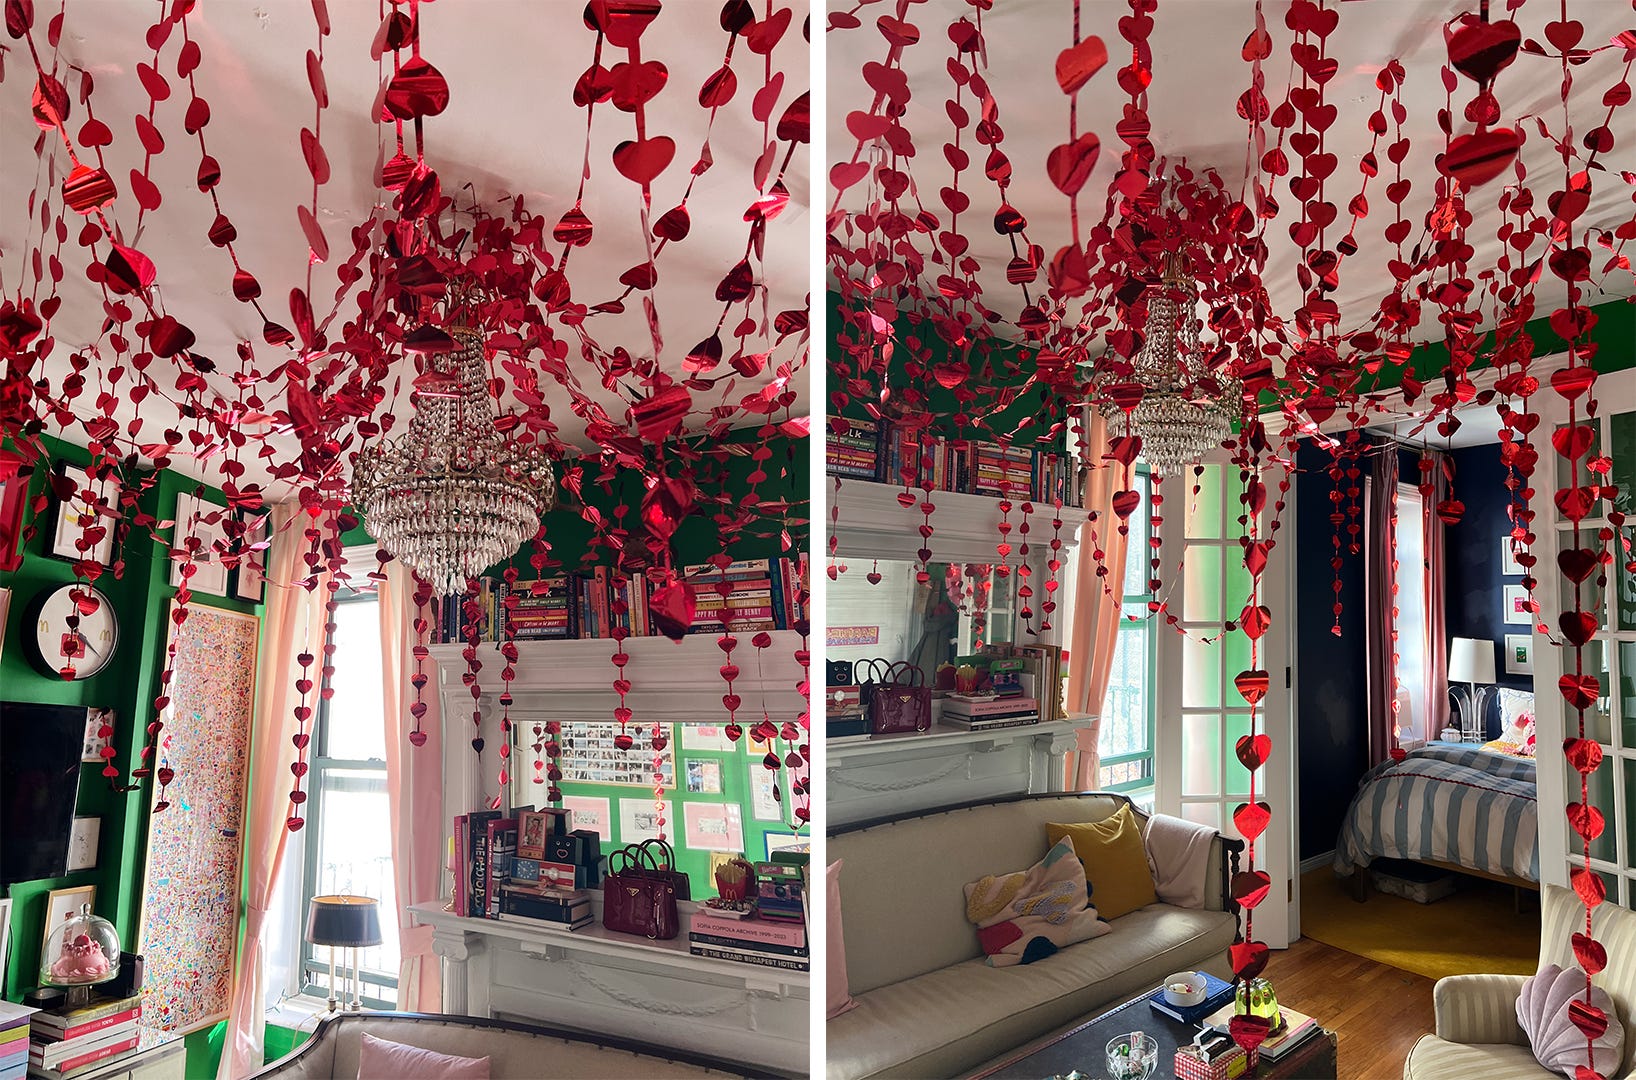
Sometime last year, I came up with the visual concept for the party: cover the entire apartment in paper hearts. To pull that off, I did what I always do: worked backward. If you want a party to feel effortless, every detail has to be mapped out in advance, from the last fork placed to the invite sent.
The Materials:
To create this look, I needed:
Paper hearts
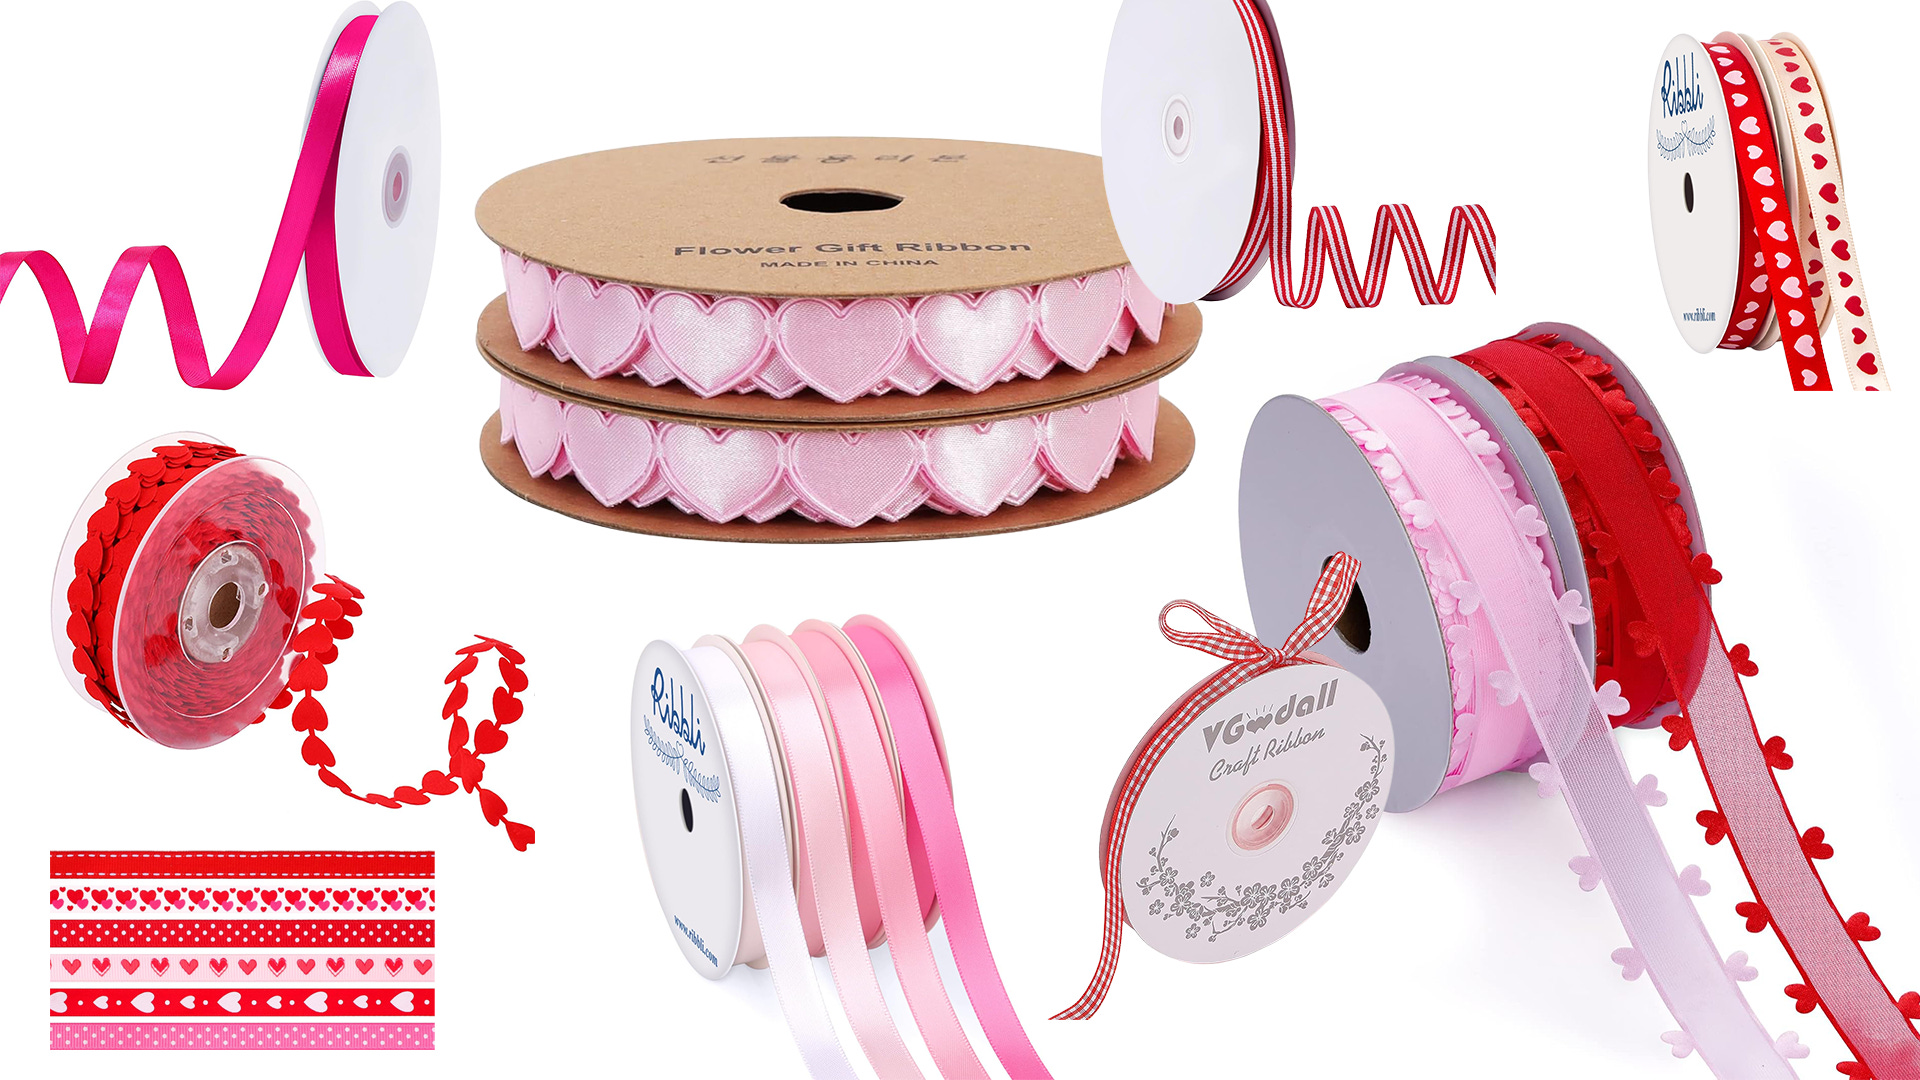
Ribbon
Tape
Hot glue
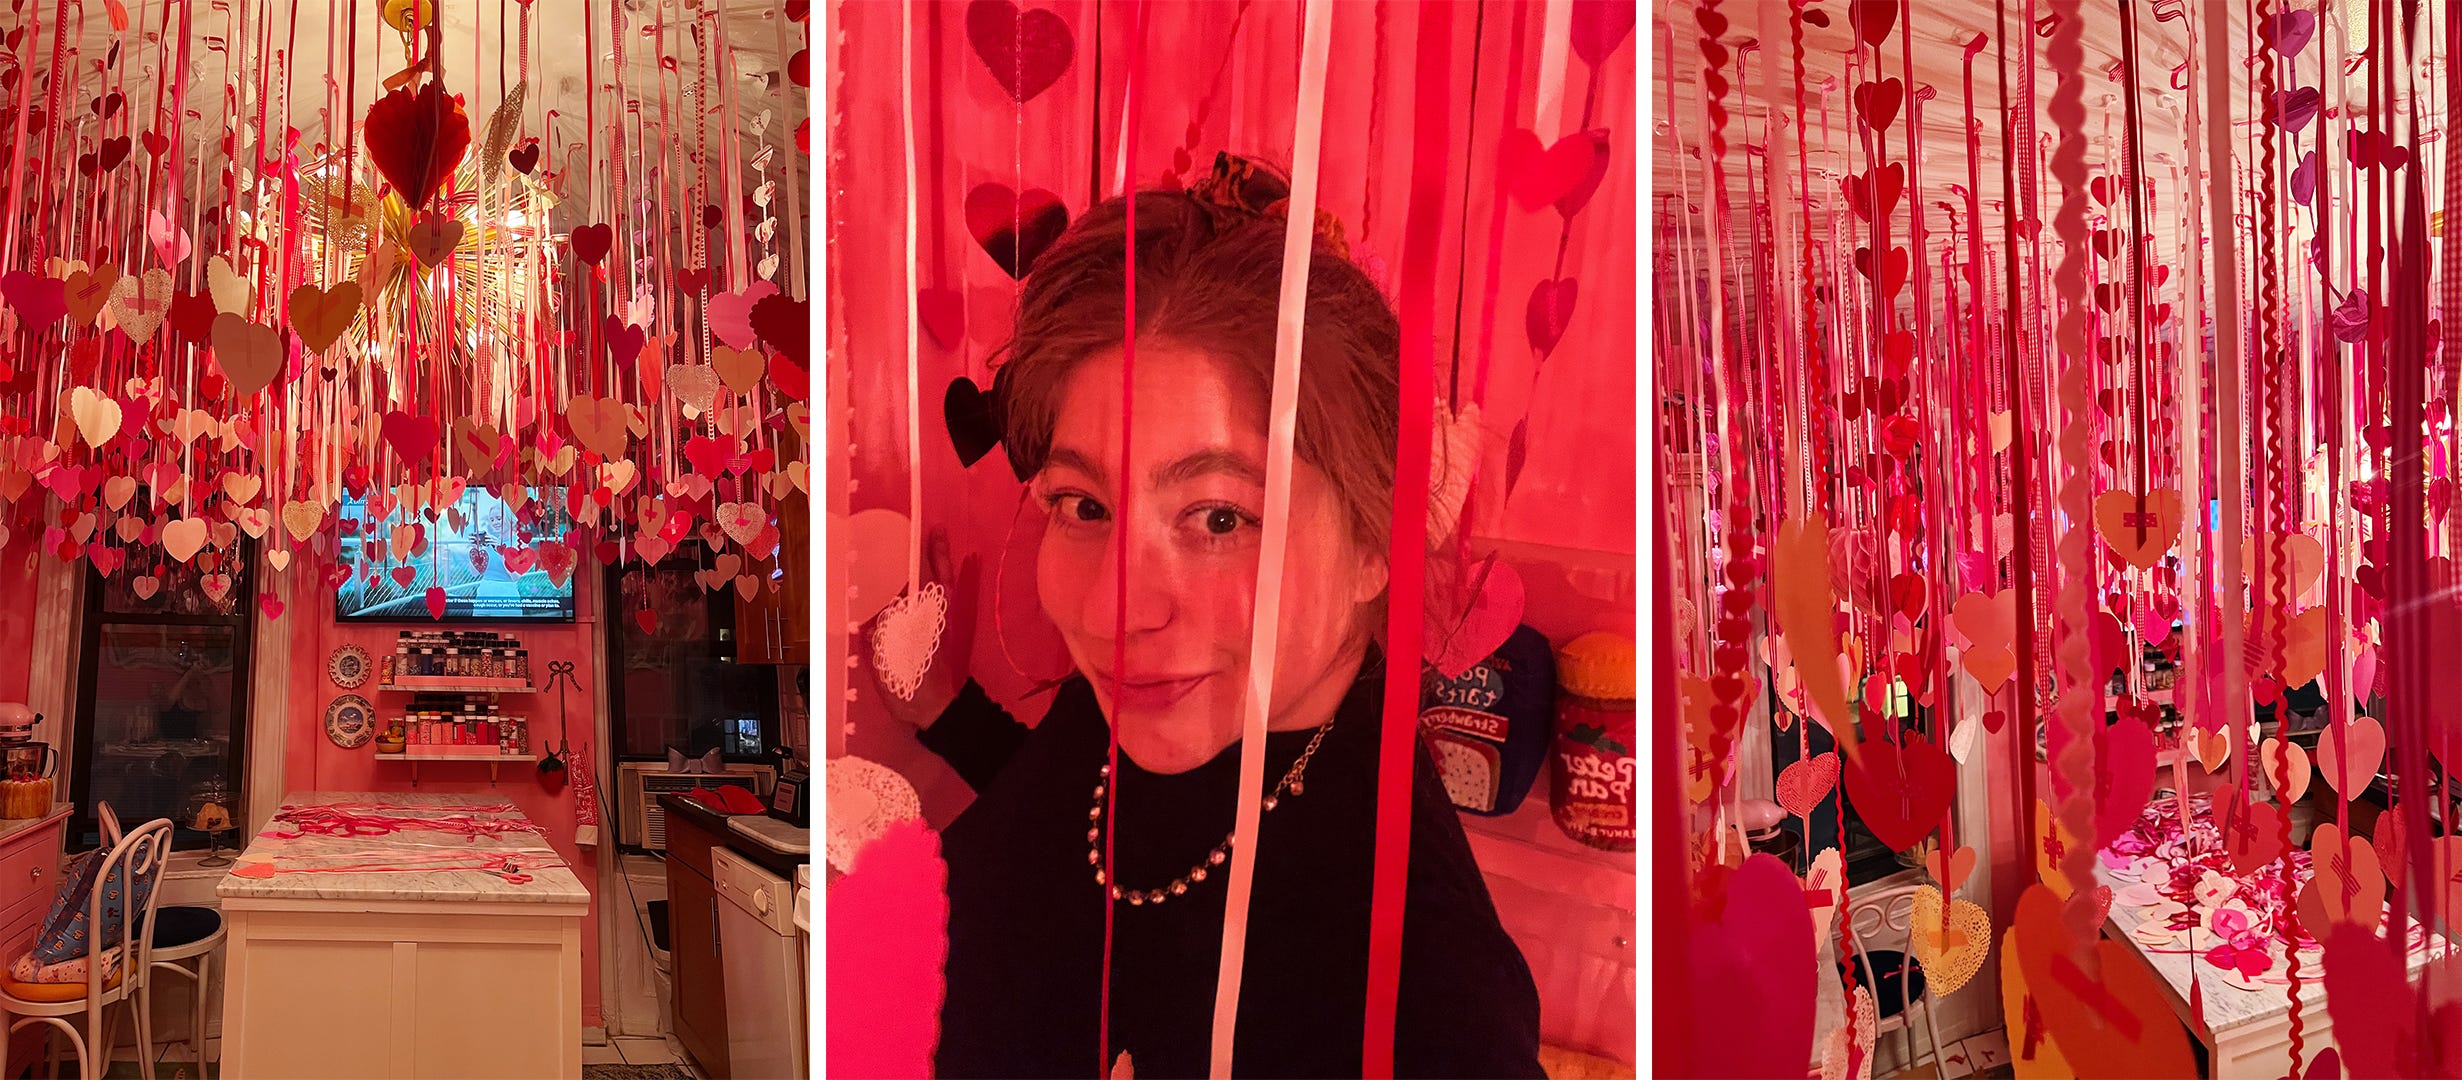
The concept was simple: cut ribbon pieces, tape them to the back of each heart, create a small loop at the top with hot glue, run scotch tape through the loop, and stick it to the ceiling. Because the materials are lightweight, standard tape works perfectly.
I sourced the hearts from Etsy–a mix of sizes, textures, and shades within my palette. Around December 27th, I ordered about 2,000 hearts. It sounds excessive. It wasn’t.
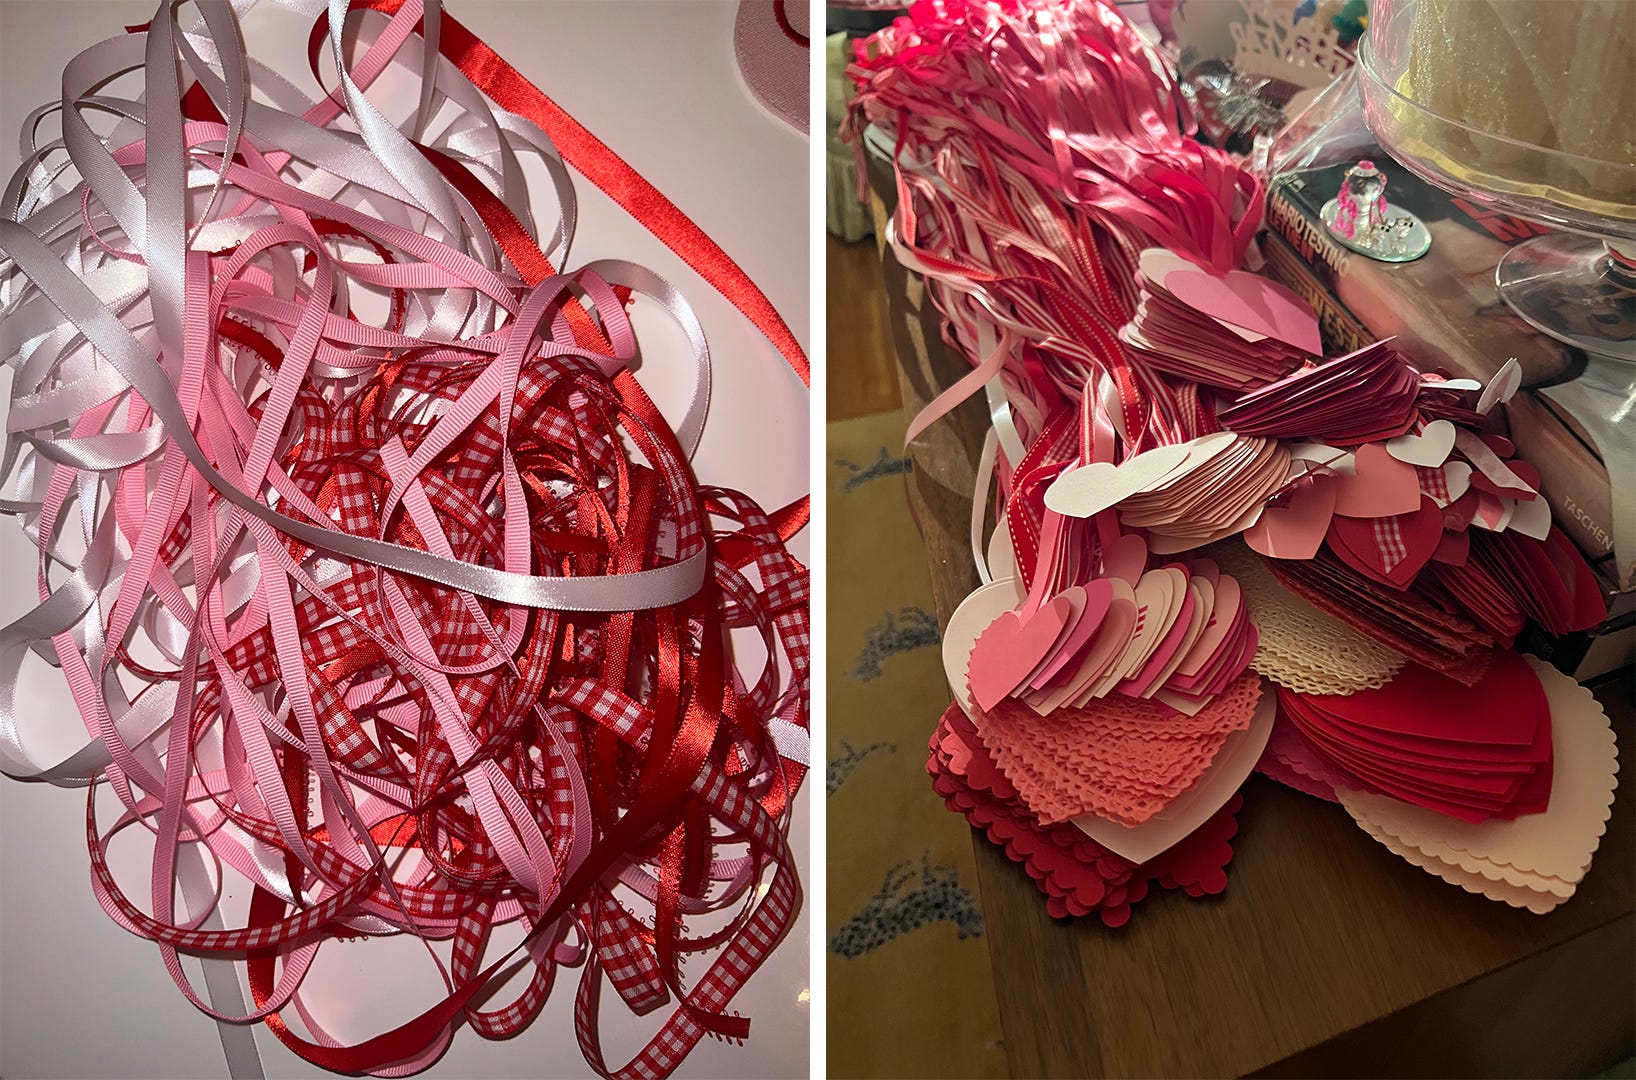
To add depth and dimension, I layered in paper honeycomb hearts, mylar heart garlands, and glitter heart strands between the flat paper pieces.
The Math (Yes, There Was Math)
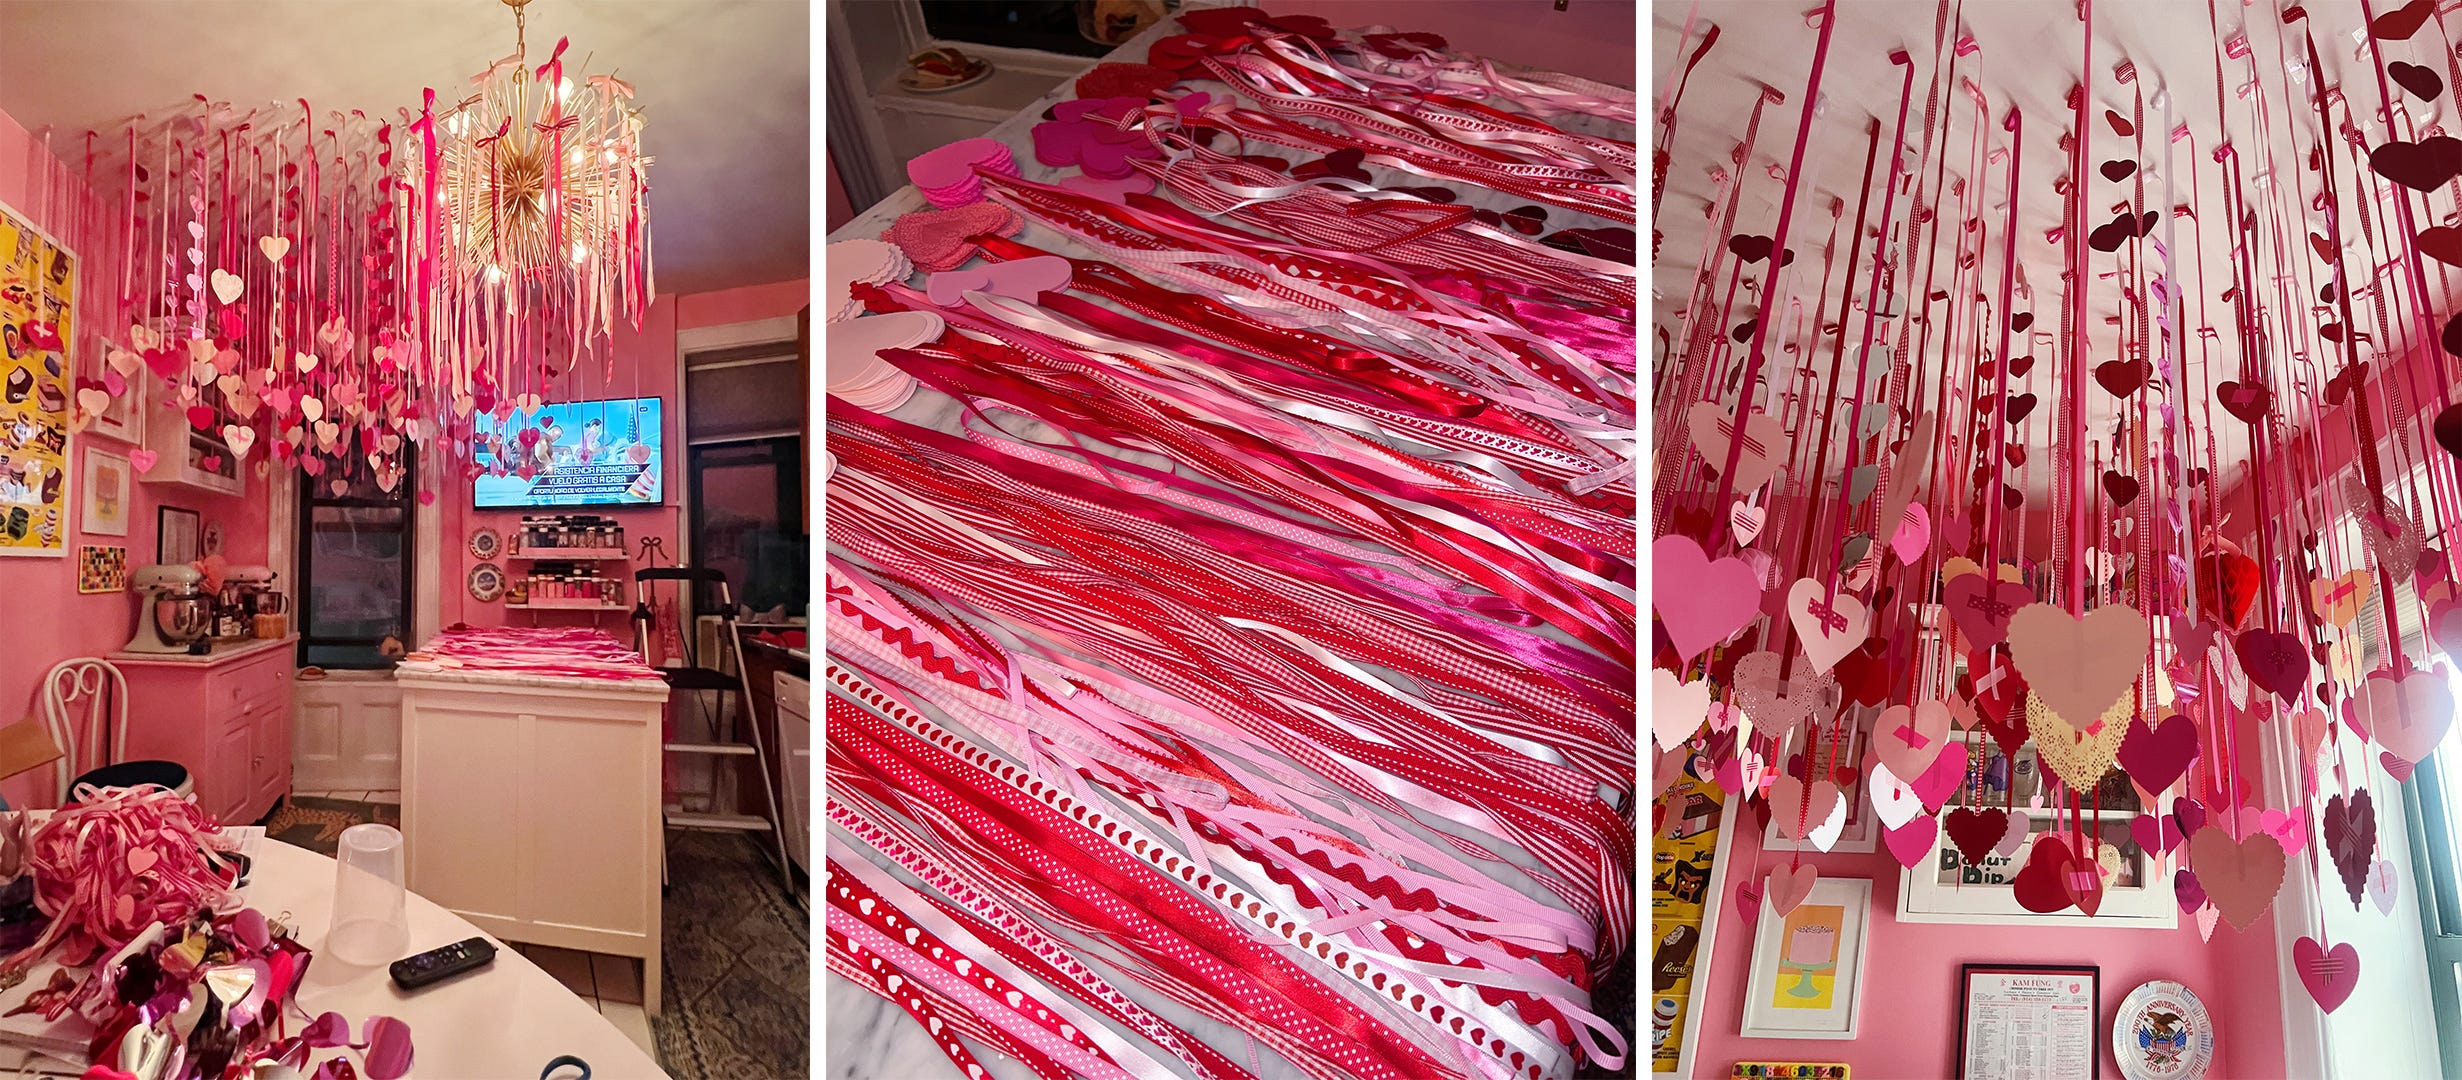
I measured from the ceiling to determine how low I wanted the hearts to hang. The goal: visible in photos but not blocking faces. I landed on an average of 3 feet.
36 inches (per ribbon) × 2,000 hearts = 72,000 inches of ribbon.
A completely reasonable situation.
I ordered spools from Amazon, Etsy, and Michaels–mixing textures, materials, and colors for variation.
Once the ribbon arrived, I cut it into varying lengths to create movement across the ceiling. Each strand was attached to a heart using festive washi tape (from washitape.com).
This took up the second half of holiday break.
Installation
On January 10th, installation began.
It quickly became clear this was… ambitious. There were moments of regret asking myself out loud “Oh what have I done?”. After two full days of taping hearts to the ceiling, I realized I was running out.
I had planned this amount for the entire apartment. I hadn’t even finished the kitchen. This is why you start early. It leaves room to pivot.
I decided the kitchen would be the only paper heart room. I realized I had all these extra mylar hearts (the amount i had of those was correct), so, I draped about 50 heart garlands across the living room ceiling, creating what I started calling the “heart fountain.” During a marathon of Annie Hall, Manhattan, and Interiors, it all came together.
The remaining garlands were taped along the hallway walls, and I ordered 30 pink balloons to fill the ceiling in that space for a soft, floating effect. (yeah so I forgot to photograph this)
Ten days later, I returned to finish applying the rest of the hearts. After a few more films and a lot more tape, it was complete.
A few other January to-dos:
Design and send the invite by January 14th. Sent.
Create and upload the playlist to YouTube. She went live January 31.
Decide what I’m wearing. Chosen and at the tailor.
Book party support. Confirmed.
Secure entertainment. Special shoutout to Sara for helping lock in our tattoo artist and to my friend Deva for planting this idea two Valentine’s Days ago.

Hello, February.
With the decor complete, it was time to focus on the food.
When I first started planning, I reviewed last year’s menu and made cuts. As much as I love abundance, not every guest eats 30 cookies. What?! To simplify things, I decided to serve half the number of cookies compared to last year and added options that didn’t require baking.
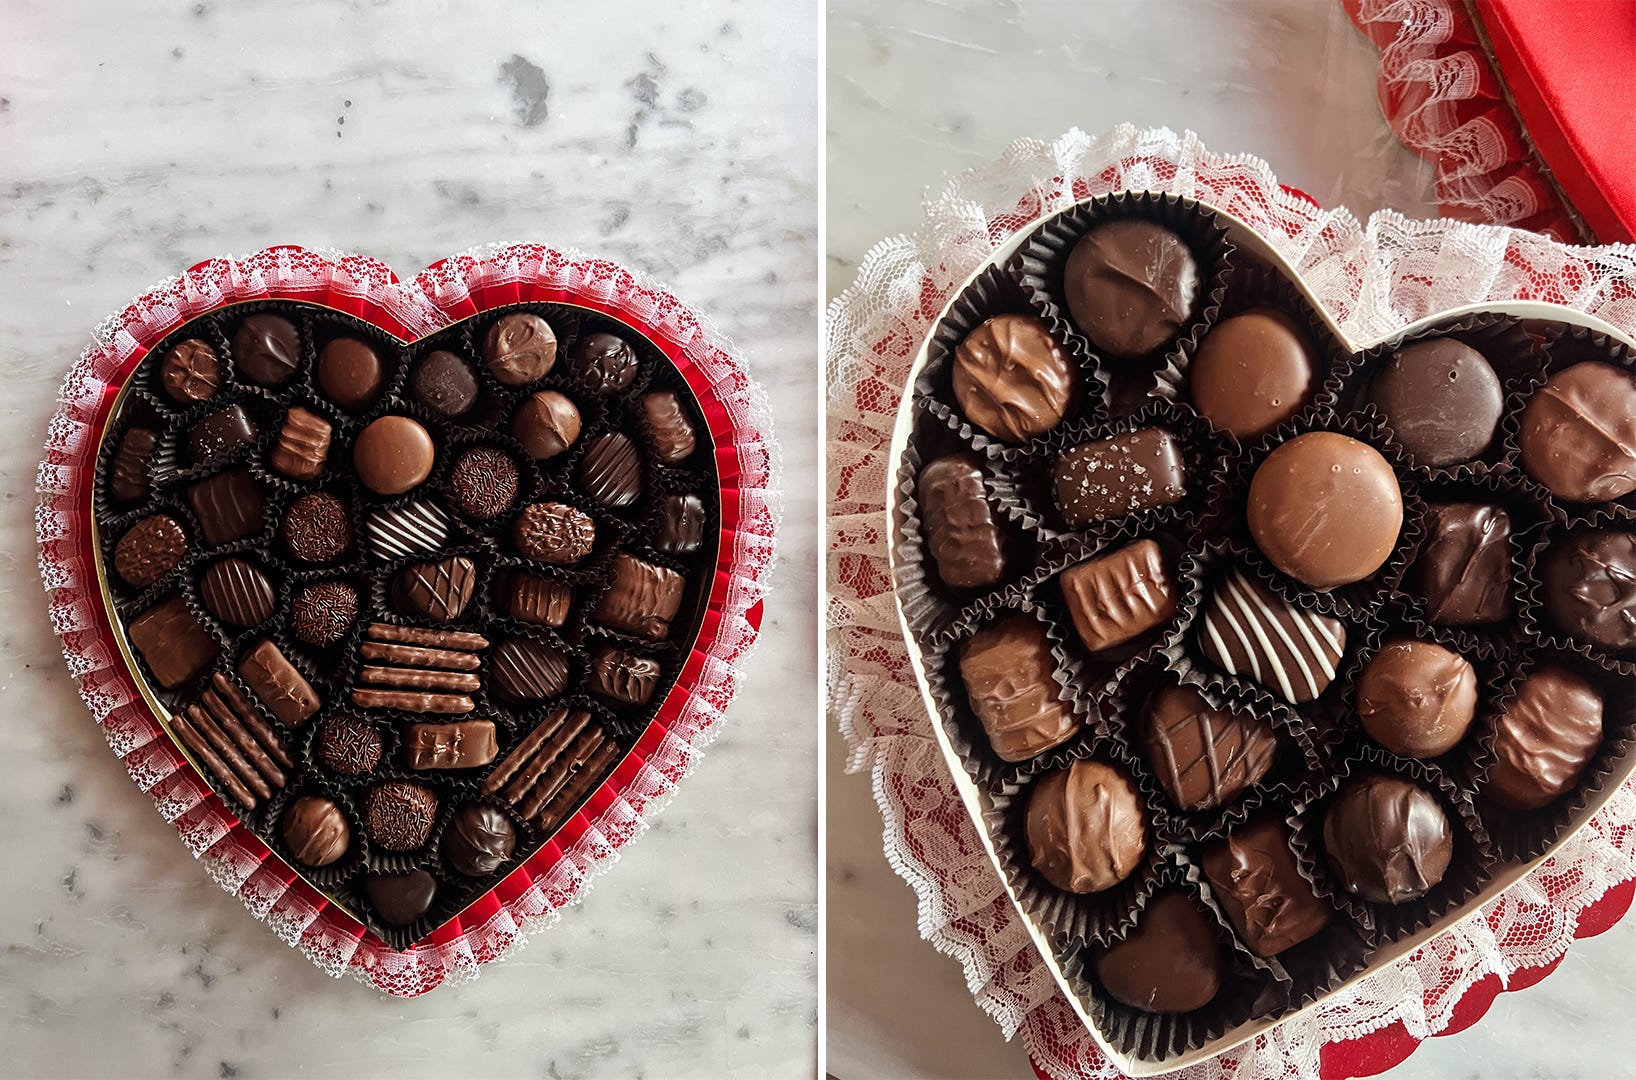
The first new idea: a chocolate buffet. It felt almost ridiculous that I’d never featured a large heart-shaped chocolate box before–it’s practically the symbol of Valentine’s Day.
In January, I started sourcing vintage lace-trimmed chocolate heart boxes on eBay. My one requirement: ruffles along the edges. After securing three, I brought them to See’s Candies on the first of the month.
The staff was incredible. They loved the concept and even offered to place all the chocolates directly into the vintage boxes. I gave them a list of specific flavors, and they handled the rest. Pickup was set for the 12th.
They were especially grateful I came in two weeks before Valentine’s Day–consider that your reminder to plan ahead.
Chocolates: Done!
The next thirteen days were mapped out with precision. Each day had a specific assignment: make a dough, order candles, call Balloon Saloon to confirm delivery, visit the storage unit, and so on.
Planning this far in advance makes an event of this scale feel completely manageable. At first, the vision can seem overwhelming–almost impossible. And when you don’t prepare, the day-of turns into chaos.
But spacing it out and checking off one task at a time changes everything. By the time the party arrives, there’s no scrambling–just enjoying what you built.
To hear more about the day of, check out this week’s